


Like some of our readers, I have never embroidered anything in my life. However, all of us probably have some type of embroidered clothing. It could be your company clothes, your favorite hoodie, or even that hat you never wear. I had no idea what the process behind embroidering any item was, so you can imagine my excitement when I was told to write an article about our company’s embroidery department. My first step in this process was to find someone knowledgeable in embroidery. Therefore, I sought the advice of one of our in-house embroidery specialists. She gave me a thorough rundown, and now I can spread the good word about our embroidery manufacturing process, what types of clothes you can embroider, and what you should expect as a customer.
Let's get started!
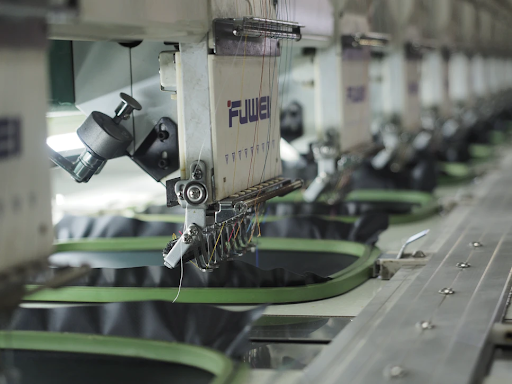
We began at the place where our business is handled, the Embroidery Room. This spacious room holds our fleet of embroidery machines, each of which can stitch up to six pieces at once! The hum of these machines chittering away is truly something to behold.
When most people think of needlework, they probably think of their grandma’s hand-stitched clothing. What we do is totally different from that! The basic concept is the same, utilizing thread to make appealing drawings, but the method has changed dramatically. Now, it is much more computerized, with the machine technicians not having to complete each product by hand. As technology has progressed, we can now use digital embroidery machines to speed up the process significantly. This guarantees that you will receive your precious products at lightning speed! It also ensures a consistent outcome, so your logo looks the same every time. Overall, highlighting our company’s commitments to speed and consistency.
Below, I hope to teach you all about the embroidery process. I hope this helps you better understand embroidery, and that it inspires you to include some embroidered items in your next order! Imagine you added an item from our website for embroidery. What happens next? If you are curious, keep reading!
Step 1: Your Concept!

Logo/Design
Each project begins with you and your ideas, just as it does with screen printing and any of our other services. It’s our job to help you bring your ideas to life, and help you to promote your brand.
Most businesses have their own logo ready to be embroidered. This helps to streamline the process since it means we only need to scan the logo into the embroidery machine. However, if you are a new company, or you don't already have a logo for any other reasons, that is perfectly fine! We have a wonderful team of designers that can work with you and your company to help you create something you’ll love and be proud to present. Branding is an important part of every business, and your logo is perhaps the most crucial. We understand that and want to make sure everything is perfect and no decisions are hastily rushed.
After creating the logo, our graphic designers will develop a digital prototype of what your finalized order will look like. It's your duty to sign off on all components of this approval form, and tell us we're good to go!
One awesome thing about us is that once we help you create your logo, and an order is placed, we will save your customer files for life. There is a setup fee for your first order, but after that, you’re good to go. Therefore, it will be easy to reorder if you need new products or have added employees!
Apparel Type
If you’re like me, you’re probably wondering what materials you can embroider on. Well, there’s actually a lot of perfect products that can help with your apparel necessities.
Here are a few examples!
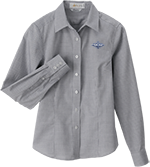
- Company Polos
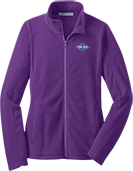
- Hoodies for the winter
- Sports warmup uniforms
- Trucker Caps and Beanies
- Baseball Caps
- School Bags
- Purses
- Chef’s Aprons
- Stunning Vests
If you can picture it embroidered, it probably can be! You can embroider tons of different materials and products.
Do any of those sound intriguing for your business? We have a wide variety of products to choose from. Some of our most popular are trucker hats, including the 51-RC and 5-PT. On top of that, we have company polo shirts like the 61-ZZ and 61-GD. Looking for something else? We have everything from hoodies to can coolers on www.logoup.com. Come drop by and take a look.
Step 2: Set Up Design File
So, now that you have your finished logo, what’s next? It’s time to set up. Each of the embroidery machines has a little computer that reads the design files. We transmit your design from the main computer to the embroidery machine using USB sticks. After plugging in the USB, we choose the thread colors for each area of the pattern. Each embroidery head has 15 needles, so we could theoretically make a design with up to 15 distinct colors! The majority of designs have about one to three colors, so we’re well equipped for your colorful ideas.
Step 3: Hooping

After setting up the design, it’s time for hooping. We wrap the garment in a hoop to keep the cloth taut. We wouldn’t want the embroidery to be messed up because of a few shirt wrinkles. Then, to keep the garment in place, the hoop is snapped into the machine. Therefore, everything is locked into position and ready before we begin embroidering.
Step 4: Trace it Out
Once the items have been properly hooped, we put them on the real machine. This is when we double-check that the design is centered inside the hoop and on the garment appropriately. We wouldn’t want to give you off-centered products. Fortunately, we won't have to sew a test design to check all of this. Instead, we may use the machine to sketch the contour of where the pattern will go in the hoop. If the tracing isn't to our satisfaction, we can move the beginning point around till it's just where we want it. This way, we can save precious materials from our mistakes and complete our work perfectly.
Step 5: Sew the Design
We've been working hard to get to this point: sewing the design out! This stage only requires pressing the green "Start" button, after which the embroidery machine will take over.
If the machine runs out of bobbin thread or has another difficulty, it may have to stop sewing in the middle of a stitch. In this situation, resolving the issue and restarting the computer usually takes only a few seconds.
Step 6: Trim Backing & Threads
After the computer finishes the design, our embroidery crew takes each piece off the machine and removes the hoop from the garment. This is when we remove or cut away the backing and add the finishing touches to the artwork. To ensure that the finished result looks clean, we use trimming scissors with very sharp tips to gently clip away any of the leftover threads that hang from the product.
After that, the completed embroidered pieces are neatly folded and packaged into boxes, ready to make their way to you!
Conclusion
By now, you should have a better grasp of what embroidery is and how it works from beginning to end. At LogoUp, we take great effort to ensure that our customers receive the best possible completed product.
Thank you for joining me on this process, and I hope you'll think about including embroidered merchandise in your next order. See you next time!
Categories
Recent Posts
- The Best Custom Polos for Workwear and Events
- The Most Popular Custom Hats for Every Occasion
- Why Choose a Mesh Back Hat?
- Exploring Backstrap Options: The Benefits and Drawbacks of Popular Hat Closures
- The Perfect Pair: Branded Bills Hats for Embroidery
- Trendy Camo Hats for the Outdoors: Customize the Richardson 111P with LogoUp
- The Ultimate Guide to Customizing the Richardson 320 Washed Chino Hat with Embroidery
- Embroidery on the Otto Cap 39-165: High-Performance Customization for Every Occasion
- LogoUp Holiday Gifts: Embroidered and DTF-Decorated Richardson 112, 112PFP, and 112PM
- Gifting LogoUp Custom Campfire Mugs: Thoughtful, Versatile, and Personalized


Add Comment